Floors, showers and backsplashes set straight, level and sealed.
Tile installation is a transformative process that enhances the aesthetic appeal and functionality of both residential and commercial properties. Whether you’re a professional contractor or a DIY enthusiast, understanding the step-by-step process is key to achieving a flawless finish. Here’s a comprehensive guide on how to install tiles effectively for both residential and commercial settings.
Begin by evaluating the surface where the tiles will be installed. Ensure the area is clean, dry, and structurally sound. Remove any old flooring or debris that could interfere with the installation process.
Accurate measurements are crucial to determine the amount of tile and materials needed. Measure the length and width of the area and multiply these to calculate the square footage. Purchase 10-15% extra tiles to account for cuts, breakage, and future repairs.
Select tiles suitable for the intended use. For residential spaces, ceramic or porcelain tiles are popular choices due to their durability and variety of designs. Commercial properties often require more robust options like quarry or natural stone tiles to withstand heavy foot traffic.
You’ll need the following tools and materials:
A level surface is critical for a professional finish. Use a leveling compound to fill in low spots and sand down high points. For commercial spaces, consider adding an underlayment for additional durability.
If installing tiles on a porous surface like concrete, apply a primer to improve adhesion.
Before applying adhesive, lay out the tiles without mortar to determine the best arrangement. This helps identify where cuts will be necessary and ensures a balanced design.
Use a chalk line to create straight guidelines on the floor or wall. Start at the center and work your way outward to ensure symmetry.
Prepare the tile adhesive according to the manufacturer’s instructions. Only mix enough that can be used within 30 minutes to avoid it drying out.
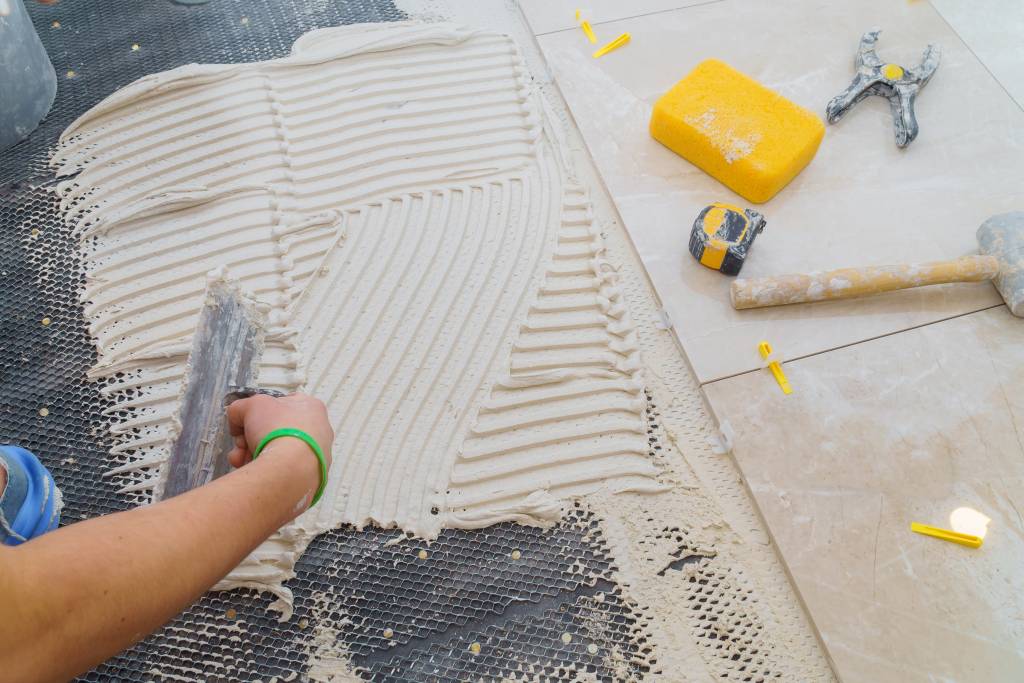
Use a notched trowel to spread a thin, even layer of adhesive on the surface. Work in small sections to prevent the adhesive from setting before the tiles are placed.
Position the tiles firmly onto the adhesive, following the guidelines. Use tile spacers to maintain consistent gaps between tiles for grouting.
For edges and corners, use a tile cutter or wet saw to make precise cuts. Always wear safety goggles while cutting tiles.
Let the adhesive cure for 24-48 hours before grouting.
Mix the grout to a smooth consistency. Use a rubber float to apply grout diagonally across the tile joints, pressing it firmly into the gaps.
After 10-15 minutes, wipe the tiles with a damp sponge to remove excess grout. Rinse the sponge frequently to avoid spreading grout haze.
Once the grout has dried, use a clean cloth to buff the tiles and remove any remaining haze.
Apply a grout sealer to protect against moisture and stains, especially in wet areas like bathrooms and kitchens.
Check for any uneven tiles or gaps. Make necessary adjustments before the adhesive fully sets.
Install baseboards or transition strips to complete the look. For commercial spaces, ensure all safety requirements and aesthetic standards are met.
Tile installation can elevate the appearance of residential and commercial properties while providing a durable and easy-to-maintain surface. By following these steps, you can achieve a professional-grade finish that meets both aesthetic and functional requirements. Whether you’re updating a cozy kitchen or outfitting a high-traffic commercial lobby, proper planning and execution are the keys to success.
No pressure, no obligation.
Had the best experience with this company and did an excellent job in remodeling. Definitely recommend them!
Yazmine PerezThey replaced the drywall in my garage, then sanded, primed and painted it, plus the door. All for a very reasonable price. I couldn't be more satisfied with the finished product.
Doris WoolenSsay Painting did a wonderful job fixing my drywall so the texture and paint match. The job was very clean and professional. I would definitely recommend them.
Manuel PerezFree, no-obligation estimates across Dallas–Fort Worth.